【GoogleHomeでメモ帳アプリを作る】2. Djangoのチュートリアルをする
概要
資料全体の構成はここに記載: GoogleHomeに話しかけてメモを記録したりメモを読み上げてもらう
チュートリアル
はじめての Django アプリ作成、その 1
https://docs.djangoproject.com/ja/2.0/intro/tutorial01/
Django がインストールされているかどうか、またどのバージョンがインストールされているかを調べるには、以下のコマンドをシェルプロンプト(先頭の $ は入力待ちを示す記号です)で実行します。
[~/git/django-tutorial] $python -m django --version                                  (git)-[master]
2.0
[~/git/django-tutorial] $                                                            (git)-[master]
プロジェクトを作成する
初めて Django を使うのなら、最初のセットアップを行う必要があります。通常は、 Django の プロジェクト (project) を構成するコードを自動生成します。プロジェクトとは、データベースの設定や Django 固有のオプション、アプリケーション固有の設定などといった、個々の Django インスタンスの設定を集めたものです。 コマンドラインから、コードを置きたい場所に cd して、以下のコマンドを 実行してください。
実行すると、現在のディレクトリに mysite ディレクトリが作成される
$ django-admin startproject mysite
プロジェクトの名前を付けるとき、組み込みの Python モジュールや Django のコンポーネントの名前を使わないようにしてください。とりわけ、 django (Django 自体と名前が衝突します) や test (組み込みの Python パッケージ名と名前が衝突します) を使わないようにしましょう。
この時点で以下のファイルができている
[~/git/django-tutorial/tutorial2] $django-admin startproject mysite                  (git)-[master]
[~/git/django-tutorial/tutorial2] $tree                                              (git)-[master]
.
└── mysite
    ├── manage.py
    └── mysite
        ├── __init__.py
        ├── settings.py
        ├── urls.py
        └── wsgi.py

2 directories, 5 files
[~/git/django-tutorial/tutorial2] $
各ファイルの意味
外側のmysite - 一番の上のmysite/ ルートディレクトリは、このプロジェクトのただの入れ物です
manage.py - Django プロジェクトに対する様々な操作を行うためのコマンドラインユーティリティです。 - 詳しくは django-admin と manage.py 内の manage.py を参照してください。
内側のmysite - 内側の mysite/ ディレクトリは、このプロジェクトの実際の Python パッケージです。この名前が Python パッケージの名前であり、 import の際に 使用する名前です - (例えば import mysite.urls) 。
settings.py - mysite/settings.py: Django プロジェクトの設定ファイルです。 - 設定の仕組みは Djangoの設定 を参照してください。
urls.py - mysite/urls.py: Django プロジェクトの URL 宣言、いうなれば Django サイトにおける「目次」に相当します。
wsgi.py - mysite/wsgi.py: プロジェクトをサーブするためのWSGI互換Webサーバーとのエントリーポイントです。
プロジェクトを作成する
Django のプロジェクトがうまく動作するか確認しましょう。外側の mysite ディレクトリに移動ができたら下記のコマンドを実行してください
$ python manage.py runserver
実行結果
[~/git/django-tutorial/tutorial2/mysite] $python manage.py runserver                 (git)-[master]
Performing system checks...

System check identified no issues (0 silenced).

You have 14 unapplied migration(s). Your project may not work properly until you apply the migrations for app(s): admin, auth, contenttypes, sessions.
Run 'python manage.py migrate' to apply them.

February 02, 2018 - 14:44:21
Django version 2.0, using settings 'mysite.settings'
Starting development server at http://127.0.0.1:8000/
Quit the server with CONTROL-C.
You have 14 unapplied migration(s). Your project may not work properly until you apply the migrations for app(s): admin, auth, contenttypes, sessions.Run 'python manage.py migrate' to apply them. と出ているが
適用されていないデータベースマイグレーションについての警告はここでは無視します、後ほどすぐにデータベースとともにたっぷりと取り組みます。
とチュートリアルに書いてあるので上の警告は無視してOK
注意
このサーバは開発中の利用だけを考えて作られています。絶対に運用環境では 使わないでください (筆者たちの専門は Web フレームワークであって、Web サーバではありません)。
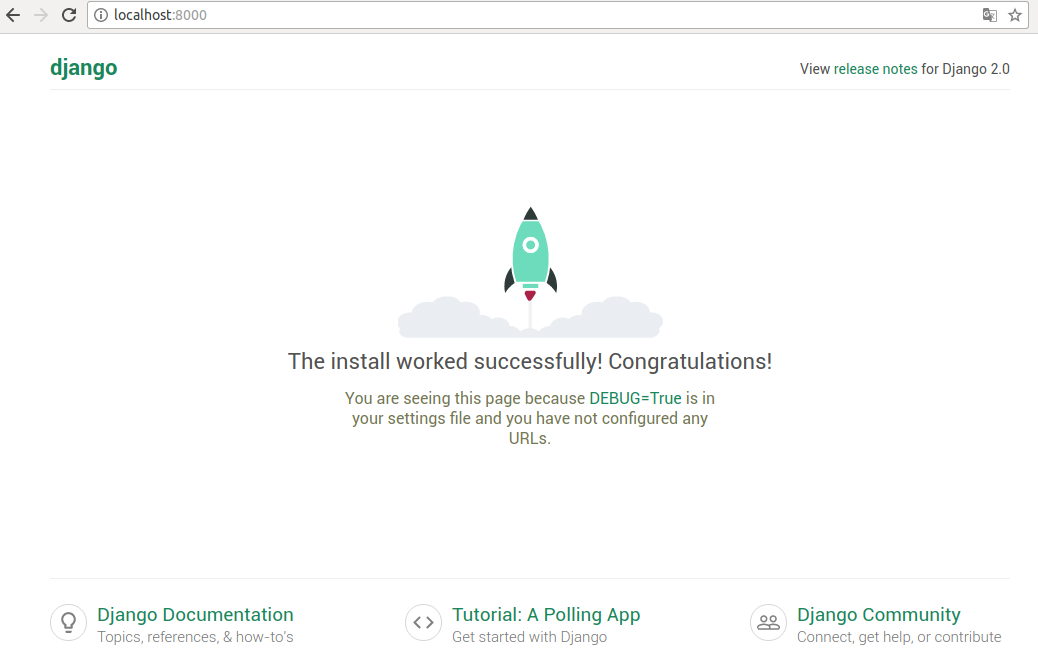
これで http://localhost:8000/ にアクセスするとちゃんと見られた → 「The install worked successfully! Congratulations!」 の画面が出た
runserverについて
https://docs.djangoproject.com/ja/2.0/ref/django-admin/#runserver
デフォルトの IP アドレス 127.0.0.1 は、同じネットワーク上の他のマシンからはアクセスできないことに注意してください。開発用サーバーを他のマシンから見られるようにするには、ネットワーク上の自分のローカル IP アドレス (例 192.168.2.1) または 0.0.0.0 や :: (IPv6 が有効な場合) を使用してください。
サーバーのポートを変えたい場合は、以下のようにコマンドライン引数を渡してください。このコマンドによってポート 8080 で起動させれます:
$ python manage.py runserver 8080
のように、ポート番号を変えることもできる
これで http://localhost:8080/ にアクセスすると上と同じ画面が得られる
サーバの IP を指定するときには、ポート番号も一緒に指定します。 例えば、 全ての IP からのリクエストを受け付ける (サーバを他のコンピュータから見えるようにする) には、以下のようにします:
$ python manage.py runserver 0:5000
上記のWebサーバは仮想マシンのUbuntuに立てたが、ホストマシンのWindowsからも見られるはず ※自分のUbuntuでは以下の通り5000と8181のポートのみアクセスを受け付けるようにファイアウォールを設定しているので、 ここではポートを5000とした
自分の環境のubuntuのufwの設定
[~/git/django-tutorial/tutorial/mysite] $sudo ufw status                             (git)-[master]
状態: アクティブ

To                         Action      From
--                         ------      ----
8181                       ALLOW       Anywhere
80                         ALLOW       Anywhere
5000                       ALLOW       Anywhere

[~/git/django-tutorial/tutorial/mysite] $
Ubuntuで立てたDjangoのWebサーバにホストOSのWindowsからアクセスしてみる
さて、これでホストOSのWindowsからゲストOSで立ち上げたUbuntuのサーバが、IPアドレスとポート5000を指定して見られるはず。。 http://192.168.3.11:5000/ あれ・・・ 見られない
ALLOWED_HOSTSについて - https://docs.djangoproject.com/ja/2.0/ref/settings/#allowed-hosts
[~/git/django-tutorial/tutorial2/mysite/mysite/settings.py
# SECURITY WARNING: don't run with debug turned on in production!
DEBUG = True

#ALLOWED_HOSTS = []
ALLOWED_HOSTS = ['localhost', '127.0.0.1', '[::1]', '192.168.3.11'] ← ここを変える
改めて実行するとWindowsからも見られた
Polls アプリケーションをつくる
チュートリアルではPollsというWebアプリケーションを作る様になっているので、それにしたがってアプリケーションを作成する
プロジェクトとアプリケーション
アプリケーションとは
アプリケーションとは、実際に何らかの処理を行う Web アプリケーションを指します。 例えばブログシステムや公開レコードのデータベース、単純な投票アプリといった具合です。
プロジェクトとは
プロジェクトとは、あるウェブサイト向けに設定とアプリケーションを集めたものです。 一つのプロジェクトには複数のアプリケーションを入れられ ます。また、一つのアプリケーションは複数のプロジェクトで使えます。
アプリケーションを作るには、 manage.py と同じディレクトリに入って、このコマンドを実行します:
[~/git/django-tutorial/mysite] $ python manage.py startapp polls
このコマンドは polls というディレクトリを作成します。中身はこのようになっています:
[~/git/django-tutorial/tutorial2/mysite] $ls                                                                        (git)-[master]
db.sqlite3  manage.py*  mysite/
[~/git/django-tutorial/tutorial2/mysite] $python manage.py startapp polls                                           (git)-[master]
[~/git/django-tutorial/tutorial2/mysite] $tree                                                                      (git)-[master]
.
├── db.sqlite3
├── manage.py
├── mysite
│   ├── __init__.py
│   ├── __pycache__
│   │   ├── __init__.cpython-36.pyc
│   │   ├── settings.cpython-36.pyc
│   │   ├── urls.cpython-36.pyc
│   │   └── wsgi.cpython-36.pyc
│   ├── settings.py
│   ├── urls.py
│   └── wsgi.py
└── polls
    ├── __init__.py
    ├── admin.py
    ├── apps.py
    ├── migrations
    │   └── __init__.py
    ├── models.py
    ├── tests.py
    └── views.py

4 directories, 17 files
[~/git/django-tutorial/tutorial2/mysite] $
Django で最も単純なビューを作成する
[~/git/django-tutorial/tutorial2/mysite] $cat polls/views.py                                                        (git)-[master]
from django.http import HttpResponse


def index(request):
    return HttpResponse("Hello, world. You're at the polls index.")
[~/git/django-tutorial/tutorial2/mysite] $
ビューを呼ぶために、 URL を対応付けしてやる必要があります。そのためには URLconf が必要です。 ← 重要
[~/git/django-tutorial/tutorial2/mysite] $cat polls/urls.py                                                         (git)-[master]
from django.urls import path

from . import views

urlpatterns = [
    path('', views.index, name='index'),
]
[~/git/django-tutorial/tutorial2/mysite] $
ルートのURLconfに polls.urls モジュールの記述を反映させることが必要
mysite/mysite/urls.py に以下を記載
from django.urls import include, path  ← includeを追加
from django.contrib import admin

urlpatterns = [
    path('polls/', include('polls.urls')),    ← 追加
    path('admin/', admin.site.urls),
]
注意
URLパターンをインクルードするときはいつでも include() を使うべきです。
Including another URLconf
    1. Import the include() function: from django.urls import include, path
    2. Add a URL to urlpatterns:  path('blog/', include('blog.urls'))
ここまでしたらWebサーバを立ち上げる
[~/git/django-tutorial/mysite] $ python manage.py runserver
ブラウザで http://localhost:8000/polls/
で 「Hello, world. You're at the polls index.」 が表示される

先程の復習だが、以下のように、0:5000としてやれば、Windowsからも見られる $python manage.py runserver 0:5000
参考 - https://qiita.com/kqxgy385/items/466b5bab67118175be65 - https://qiita.com/kaki_k/items/b76acaeab8a9d935c35c
ここまですると、DjangoでWebサーバを作るのに必要な最低限の知識が得られる
このあとのチュートリアル02以降は、Webアプリケーションのページを作成する手順が多いので、 サーバを立てるだけであればここまでで十分かも
やったけど、ここには記載しない
djangoについて参考にしたページ
https://docs.djangoproject.com/ja/2.0/intro/tutorial01/
https://qiita.com/gctfuji/items/27d2c9e4b3334447b6af
http://qh73xebitbucketorg.readthedocs.io/ja/latest/1.Programmings/python/LIB/django/tutorial/main/
GoogleHomeに話しかけてメモを記録したりメモを読み上げてもらう
GoogleHomeでやりたいこと
やりたいこと(ぱっと思ったこと)
- 「シャンプー買わないと」とか「歯医者の予約しないと」とか、ぱっと頭に浮かんだことを言うだけでメモっておければ便利
- さらに、そのメモを読み上げてもらえれば嬉しい
- ドラクエ3で、主人公に他のキャラクターが言ったセリフを思い出すことができる特技があったので、ここから着想を得た
- ドラクエ3の主人公の特技
- おもいだす 会話を3つまで思い出す 会話を32個まで思い出す
- もっとおもいだす 会話を10個まで思い出す
- ふかくおもいだす 会話を32個まで思い出す
- ドラクエ3の主人公の特技
やりたいこと(より具体的に)
- GoogleHomeに話しかけることでメモの記録をしたい - 「Ok Google, メモって "シャンプー買う"」
- GoogleHomeに話しかけることで、記録したメモを読み上げてもらいたい - 「Ok Google, メモを読んで」→ 「シャンプー買う」
メモを記録

メモを読み上げる

こだわり
Raspberryがあればもっと色々できるが、GoogleHome以外は お金をかけず無料で 作ることを目指した
登場する単語
- GoogleHome
- GoolgleAssistant
- IFTTT
- GoogleSpreadSheet
- Actions on Google
- Dialogflow
- Heroku
- Django
GoolgleAssistant(Googleアシスタント)
公式 - https://assistant.google.com/intl/ja_jp/
概要 - https://ja.wikipedia.org/wiki/Google%E3%82%A2%E3%82%B7%E3%82%B9%E3%82%BF%E3%83%B3%E3%83%88
- アンドロイドスマホやGoogle Homeに搭載されているAI
IFTTT
公式 - https://ifttt.com/discover
概要 - https://ja.wikipedia.org/wiki/IFTTT
IFTTT(イフト)とは「レシピ」と呼ばれる個人作成もしくは公に共有しているプロフィールを使って数あるWebサービス(Facebook、Evernote、Weather、Dropboxなど)同士で連携することができるWebサービスである。
- 様々なアプリやGPSの位置情報とかを使って、プログラミングせずに他のアプリにデータを連携したりすることができる
- 今回作るものでは、GoogleAssistantからGoogleSpreadSheetにデータを連携するのに使う
GoogleSpreadSheet(Googleスプレッドシート)
公式 - https://www.google.com/intl/ja_jp/sheets/about/
概要 - https://ja.wikipedia.org/wiki/Google_%E3%83%89%E3%82%AD%E3%83%A5%E3%83%A1%E3%83%B3%E3%83%88
Googleが無料提供する、ウェブブラウザ内で動くオフィスソフト。
- オンラインで使えるエクセルみたいなもの
- PCやスマホからも見られるので外出先でも閲覧・編集できるのが良い点
Actions on Google
公式 - https://developers.google.com/actions/extending-the-assistant?hl=ja
アプリは、アクションを開発できるようにすることで、Google アシスタントを拡張するものです。アクションにより、ユーザーはあなたの製品やサービスを使用して物事を行うことができます。
- Googleアシスタントから呼び出すアプリのプラットフォーム
- 今回は後述のDialogflowを使ったアプリを管理する
Dialogflow
Give users new ways to interact with your product by building engaging voice and text-based conversational interfaces powered by AI. Connect with users on the Google Assistant, Amazon Alexa, Facebook Messenger, and other popular platforms and devices.
- GoogleAssistantなどから受け取ったユーザが発声した言葉やテキストベースの入力に対して、自然言語処理して決められたメッセージを返したり、外部のWebサービスと連携したりすることができる
- 今回作るものでは、GoogleAssistantからの入力を解析してHerokuのアプリケーションに必要な値を渡し、返却値をGoogleAssistantに返す役割を担う
Heroku
公式 - https://www.heroku.com/platform
Heroku is a cloud platform based on a managed container system, with integrated data services and a powerful ecosystem, for deploying and running modern apps.
- PAASのWebサーバを作ることができる
- pythonなどの様々な言語に対応
- 今回作るものでは、Dialogflowからのリクエストを元にGoogleSpreadSheetの値を必要な件数だけ取得して返す役割を担う
- 使うにあたって最低限のgitの知識は必要(commitとかpushとか)
Django
公式 - https://docs.djangoproject.com/ja/2.0/intro/overview/
Django は変転の激しいニュースルーム環境で開発された経緯から、よくある Web 開発タスクを迅速かつ簡単化するように設計されました。ここでは Django による データベース中心の Web アプリケーション開発をざっと見てみましょう。
アプリ作成開始時のスキル
- python: 仕事でちょっと書いている
- git: 仕事で使っている
- vim: 仕事で使っている
- IFTTT: 試しに使ったことはある
- GoogleSpreadSheet: 試しに使ったことはある
- Dialogflow: よくわからない
- Heroku: 知らない(PAASとか触ったことない)
- Django: 知らない(Webフレームワークとか触ったことない)
全体の構成
方針設計
0. やりたいことの整理と設計(このページ)
アプリ作成に向けて必要なことを調べる
アプリ作成
5. HerokuアプリでSpreadSheetの中身を取得する
6. GoogleHomeに呼びかけてSpreadSheetのメモを読み上げてもらう
7. 使い勝手を良くする
【GoogleHomeでメモ帳アプリを作る】1. Herokuのチュートリアルをする
概要
PAASサーバを提供しているherokuを使ってみる
資料全体の構成はここに記載: GoogleHomeに話しかけてメモを記録したりメモを読み上げてもらう
チュートリアル
https://devcenter.heroku.com/star からpythonを選ぶ
supported-python-runtimes
https://devcenter.heroku.com/articles/python-support#supported-python-runtimes
Supportしているpythonバージョンは以下
python-3.6.3
python-2.7.14
herokuを使うための前提条件を満たす
https://devcenter.heroku.com/articles/getting-started-with-python#introduction
a free Heroku account.
Python version 3.6 installed locally - see the installation guides for OS X, Windows, and Linux.
Pipenv installed locally. Accomplish this by running pip install pipenv.
Postgres installed locally, if running the app locally
python3.6を入れる
$ pyenv install 3.6.3

$ pyenv local 3.6.3
$ pyenv versions
  system
  3.5.4
* 3.6.3 (set by /home/ludwig125/.python-version)
$
pipenvを入れる
- pipenvとは
http://pipenv-ja.readthedocs.io/ja/translate-ja/basics.html http://pipenv-ja.readthedocs.io/ja/translate-ja/
Pipenvは、手動でパッケージのインストールおよびアンインストールを行うのと同じように Pipfile に対してパッケージの追加および削除を行うのに加え、自動でプロジェクト用の仮想環境を作成し管理します。
Pipenvの特徴 http://pipenv-ja.readthedocs.io/ja/translate-ja/#pipenv-features
何をしたいか を簡単に指定するだけで、真の 決定論的ビルド が可能です。
固定された依存関係のファイルハッシュを生成しチェックします。
pyenv が使える場合は、要求されているPythonを自動でインストールします。
Pipfile を探して、再帰的に、プロジェクトホームを自動で見付けに行きます。
Pipfile が存在していない場合、自動で生成します。
標準的な場所に仮想環境を自動で作成します。
パッケージがインストールもしくはアンインストールされたときに、自動で Pipfile に追加および削除します。
.env ファイルが存在する場合、自動で読み込みます。
$ pip install pipenv
Postgresを入れる
- Postgresとは
https://ja.wikipedia.org/wiki/PostgreSQL
https://devcenter.heroku.com/articles/heroku-postgresql#local-setup
$ export DATABASE_URL=postgres://$(whoami)
$ sudo apt-get install postgresql
$ which psql
/usr/bin/psql
$ psql
psql: FATAL:  role "ludwig125" does not exist
$
https://qiita.com/ibara1454/items/40ce2d82926f48cf02bc を参考に以下を実施
[~] $ /etc/init.d/postgresql start
chmod: `/var/run/postgresql' のパーミッションを変更しています: 許可されていない操作です
 * Starting PostgreSQL 9.3 database server
 * Error: You must run this program as the cluster owner (postgres) or root
   ...fail!
[~] $ sudo /etc/init.d/postgresql start
 * Starting PostgreSQL 9.3 database server
   ...done.
[~] $  /etc/init.d/postgresql status
9.3/main (port 5432): online
[~] $ psql
psql: FATAL:  role "ludwig125" does not exist
[~] $
 $ less /etc/passwd を見ると
postgres:x:119:128:PostgreSQL administrator
がある
$ sudo su - postgres
postgres@ludwig125-virtual-machine:~$
postgres@ludwig125-virtual-machine:~$ psql
psql (9.3.20)
Type "help" for help.

postgres=#


postgres=# \du
                             List of roles
 Role name |                   Attributes                   | Member of
-----------+------------------------------------------------+-----------
 postgres  | Superuser, Create role, Create DB, Replication | {}

postgres=#
デフォルトでは他のロールが存在しないので、ロールはスーパユーザのpostgresだけ
postgres=# SELECT rolname FROM pg_roles;
 rolname
----------
 postgres
(1 row)

postgres=#
とりあえず前提に書いてあることをしたのでこのあとからセットアップしていく
Heroku Set up
https://devcenter.heroku.com/articles/getting-started-with-python#set-up
https://devcenter.heroku.com/articles/heroku-cli#debian-ubuntu wgetでのとり方がここに書いてあった
$ wget -qO- https://cli-assets.heroku.com/install-ubuntu.sh | sh
CLIを使ってみる
$ heroku login
Enter your Heroku credentials:
Email: <アカウントを作ったときのEmail>
Password: <同上、パスワード>
Logged in as <mail>
[~] $
prepare-the-app
https://devcenter.heroku.com/articles/getting-started-with-python#prepare-the-app
アプリ作成の準備
$ git clone https://github.com/heroku/python-getting-started.git
$ cd python-getting-started
Deploy the app
https://devcenter.heroku.com/articles/getting-started-with-python#deploy-the-app
herokuのアプリの作成
- 特に指定しなければ適当なアプリ名が割り振られる こんな感じ
[~/git/ludwig125/python-getting-started] $ heroku create
Creating app... done, ⬢ powerful-chamber-29168
https://powerful-chamber-29168.herokuapp.com/ | https://git.heroku.com/powerful-chamber-29168.git
[~/git/python-getting-started] $
herokuにこのアプリをデプロイするには以下のようにgitコマンドを実施する
[~/git/ludwig125/python-getting-started] $ git push heroku master
Counting objects: 385, done.
Compressing objects: 100% (177/177), done.
Writing objects: 100% (385/385), 68.53 KiB | 0 bytes/s, done.
Total 385 (delta 184), reused 385 (delta 184)
remote: Compressing source files... done.
remote: Building source:
remote:
remote: -----> Python app detected
remote: -----> Installing python-3.6.3
remote: -----> Installing pip
remote: -----> Installing requirements with latest Pipenv…
remote:        Installing dependencies from Pipfile.lock (2899d6)…
remote: -----> $ python manage.py collectstatic --noinput
remote:        119 static files copied to '/tmp/build_ac2a9e4e970eca0b6aae1bfdd898a194/staticfiles', 145 post-processed.
remote:
remote: -----> Discovering process types
remote:        Procfile declares types -> web
remote:
remote: -----> Compressing...
remote:        Done: 60.5M
remote: -----> Launching...
remote:        Released v4
remote:        https://powerful-chamber-29168.herokuapp.com/ deployed to Heroku
remote:
remote: Verifying deploy... done.
To https://git.heroku.com/powerful-chamber-29168.git
 * [new branch]      master -> master
[~/git/ludwig125/python-getting-started] $
これでアプリがデプロイされたはずなので、アプリのインスタンスが動いていることを確認
[~/git/ludwig125/python-getting-started] $ heroku ps:scale web=1
Scaling dynos... done, now running web at 1:Free
[~/git/ludwig125/python-getting-started] $
この時点でhttps://powerful-chamber-29168.herokuapp.com/ にアクセスすると「Heroku | Welcome to your new app!」が出た

アプリのWebサイトを立ち上げるには以下のコマンドを実施する 以下でWebページ(https://powerful-chamber-29168.herokuapp.com/) に飛ぶ
[~/git/python-getting-started] $ heroku open
[~/git/python-getting-started] $
Define a Procfile
https://devcenter.heroku.com/articles/getting-started-with-python#define-a-procfile
Profileとは
- アプリのスタート時に動くファイルを定義するもの
[~/git/ludwig125/python-getting-started] $ cat Procfile
web: gunicorn gettingstarted.wsgi
[~/git/ludwig125/python-getting-started] $
Scale the app
https://devcenter.heroku.com/articles/getting-started-with-python#scale-the-app
herokuのアプリは「Dyno」の単位で動いている
Dynoって? - https://devcenter.heroku.com/articles/dynos
以下でDynoのプロセスがどういう状態か確認できる
[~/git/ludwig125/python-getting-started] $ heroku ps
Free dyno hours quota remaining this month: 547h 29m (99%)
For more information on dyno sleeping and how to upgrade, see:
https://devcenter.heroku.com/articles/dyno-sleeping

=== web (Free): gunicorn gettingstarted.wsgi (1)
web.1: idle 2017/12/22 02:08:22 +0900 (~ 20h ago)

[~/git/ludwig125/python-getting-started] $
Declare app dependencies
https://devcenter.heroku.com/articles/getting-started-with-python#declare-app-dependencies
Heroku recognizes an app as a Python app by the existence of a Pipfile or requirements.txt file in the root directory.
herokuでは、Pipfileかrequirements.txtがherokuのルートディレクトリにあると、Pythonアプリだと認識してくれるらしい
The Pipfile file lists the app dependencies together with their versions.
Pipfileはアプリの依存関係を記載する これは後述のpipenvで必要なファイルとなっている
チュートリアルのファイルを見てみるとこんな感じ
[~/git/ludwig125/python-getting-started] $ cat Pipfile
[[source]]

url = "https://pypi.python.org/simple"
verify_ssl = true


[packages]

django = "*"
gunicorn = "*"
django-heroku = "*"


[requires]

python_version = "3.6"
[~/git/ludwig125/python-getting-started] $
requirements.txtをつくっておく
[~/git/ludwig125/python-getting-started] $ pip3 freeze > requirements.txt
[~/git/ludwig125/python-getting-started] $ cat requirements.txt
certifi==2017.11.5
chardet==3.0.4
Django==2.0
flake8==3.5.0
idna==2.6
mccabe==0.6.1
pew==1.1.2
pipenv==9.0.1
pycodestyle==2.3.1
pyflakes==1.6.0
pytz==2017.3
requests==2.18.4
urllib3==1.22
virtualenv==15.1.0
virtualenv-clone==0.2.6
[~/git/ludwig125/python-getting-started] $
herokuはデプロイ時にこれらのファイルを以下のコマンドを実行することで読み込み必要な環境を作成している
pipenv install --system --skip-lock
herokuのデプロイ上の環境をローカルの開発環境で再現するために、以下pipenvの設定をする
Python 3の仮想環境を初期化するには、 $ pipenv --three を実行する
https://github.com/pypa/pipenv/issues/729 https://github.com/pypa/pipenv/issues/700 を参考に作り直す
pipenv --python 3.6.3と指定してinstallする
[~/git/ludwig125/python-getting-started] $ pipenv --rm
Removing virtualenv (/home/ludwig125/.local/share/virtualenvs/python-getting-started-1TrsocCI)…
[~/git/ludwig125/python-getting-started] $ pipenv --python 3.6.3 install
Creating a virtualenv for this project…
Using /home/ludwig125/.pyenv/versions/3.6.3/bin/python3.6m to create virtualenv…
⠋Running virtualenv with interpreter /home/ludwig125/.pyenv/versions/3.6.3/bin/python3.6m
Using base prefix '/home/ludwig125/.pyenv/versions/3.6.3'
New python executable in /home/ludwig125/.local/share/virtualenvs/python-getting-started-1TrsocCI/bin/python3.6m
Also creating executable in /home/ludwig125/.local/share/virtualenvs/python-getting-started-1TrsocCI/bin/python
Installing setuptools, pip, wheel...done.

Virtualenv location: /home/ludwig125/.local/share/virtualenvs/python-getting-started-1TrsocCI      Installing dependencies from Pipfile.lock (e19824)…
  �   ▉▉▉▉▉▉▉▉▉▉▉▉▉▉▉▉▉▉▉▉▉▉▉▉▉▉▉▉▉▉▉▉ 7/7 — 00:00:05
To activate this project's virtualenv, run the following:
 $ pipenv shell
[~/git/ludwig125/python-getting-started] $


[~/git/ludwig125/python-getting-started] $ pipenv check
Checking PEP 508 requirements…
Passed!
Checking installed package safety…
All good!
[~/git/ludwig125/python-getting-started] $
仮想環境を起動
[~/git/ludwig125/python-getting-started] $  pipenv shell
Loading .env environment variables…
Spawning environment shell (/bin/bash). Use 'exit' to leave.
source /home/ludwig125/.local/share/virtualenvs/python-getting-started-1TrsocCI/bin/activate
[~/git/ludwig125/python-getting-started] $ source /home/ludwig125/.local/share/virtualenvs/python-getting-started-1TrsocCI/bin/activate
(python-getting-started-1TrsocCI) [~/git/ludwig125/python-getting-started] $
Once dependencies are installed, you will be ready to run your app locally.
ここまでやれば、ローカル環境でアプリを実行する準備が整ったことになる
Run the app locally
https://devcenter.heroku.com/articles/getting-started-with-python#run-the-app-locally
The app is almost ready to start locally. Django uses local assets, so first, you’ll need to run collectstatic:
ここまででローカルで実行できる準備ができた。ここでcollectstaticを使う必要がある
python manage.py collectstatic
collectstatic とは http://django-staticfiles-doc-ja.readthedocs.io/en/latest/commands.html
collectstatic インストールしている全てのアプリケーションから静的ファイルを集めて STATICFILES_STORAGE にコピーします。
(python-getting-started-1TrsocCI) [~/git/ludwig125/python-getting-started] $ python manage.py collectstatic

yesを入力

(長いので省略)
Post-processed 'admin/css/responsive.css' as 'admin/css/responsive.25d98d3909ed.css'
Post-processed 'admin/css/dashboard.css' as 'admin/css/dashboard.7ac78187c567.css'

119 static files copied to '/home/ludwig125/git/ludwig125/python-getting-started/staticfiles', 145 post-processed.
(python-getting-started-1TrsocCI) [~/git/ludwig125/python-getting-started] $
ローカルサーバで実行
heroku local web でできる
(python-getting-started-1TrsocCI) [~/git/ludwig125/python-getting-started] $ heroku local web
[OKAY] Loaded ENV .env File as KEY=VALUE Format
23:48:35 web.1   |  [2017-12-22 23:48:35 +0900] [11733] [INFO] Starting gunicorn 19.7.1
23:48:36 web.1   |  [2017-12-22 23:48:35 +0900] [11733] [INFO] Listening at: http://0.0.0.0:5000 (11733)
23:48:36 web.1   |  [2017-12-22 23:48:35 +0900] [11733] [INFO] Using worker: sync
23:48:36 web.1   |  [2017-12-22 23:48:35 +0900] [11736] [INFO] Booting worker with pid: 11736
ブラウザで以下を見てみる
「Getting Started with Python on Heroku」の画面が表示された (https://github.com/heroku/python-getting-started/blob/master/hello/templates/index.html のページが表示されている)

(python-getting-started-1TrsocCI) [~/git/ludwig125/python-getting-started] $ heroku local web
[OKAY] Loaded ENV .env File as KEY=VALUE Format
23:48:35 web.1   |  [2017-12-22 23:48:35 +0900] [11733] [INFO] Starting gunicorn 19.7.1
23:48:36 web.1   |  [2017-12-22 23:48:35 +0900] [11733] [INFO] Listening at: http://0.0.0.0:5000 (11733)
23:48:36 web.1   |  [2017-12-22 23:48:35 +0900] [11733] [INFO] Using worker: sync
23:48:36 web.1   |  [2017-12-22 23:48:35 +0900] [11736] [INFO] Booting worker with pid: 11736
23:51:43 web.1   |  Not Found: /favicon.ico    ← ここが出力された
- 止めるときはCtrl+c
Push local changes
https://devcenter.heroku.com/articles/getting-started-with-python#push-local-changes
ローカルで変更した結果をherokuに反映させる方法を見る
$ pipenv install requests
requestsとは? http://pipenv-ja.readthedocs.io/ja/translate-ja/install.html
(python-getting-started-1TrsocCI) [~/git/ludwig125/python-getting-started] $ pipenv install requests
Installing requests…
Collecting requests
  Using cached requests-2.18.4-py2.py3-none-any.whl
Collecting chardet<3.1.0,>=3.0.2 (from requests)
  Using cached chardet-3.0.4-py2.py3-none-any.whl
Collecting urllib3<1.23,>=1.21.1 (from requests)
  Using cached urllib3-1.22-py2.py3-none-any.whl
Collecting certifi>=2017.4.17 (from requests)
  Using cached certifi-2017.11.5-py2.py3-none-any.whl
Collecting idna<2.7,>=2.5 (from requests)
  Using cached idna-2.6-py2.py3-none-any.whl
Installing collected packages: chardet, urllib3, certifi, idna, requests
Successfully installed certifi-2017.11.5 chardet-3.0.4 idna-2.6 requests-2.18.4 urllib3-1.22

Adding requests to Pipfile's [packages]…
  PS: You have excellent taste! ✨ � ✨
Locking [dev-packages] dependencies…
Locking [packages] dependencies…
Updated Pipfile.lock (c8a67b)!
(python-getting-started-1TrsocCI) [~/git/ludwig125/python-getting-started] $
Pipfileは以下が追加される
index 70ca30f..affd239 100644
=--- a/Pipfile
=+++ b/Pipfile
@@ -9,6 +9,7 @@ verify_ssl = true
 django = "*"
 gunicorn = "*"
 django-heroku = "*"
=+requests = "*"
以下のように修正する
(python-getting-started-1TrsocCI) [~/git/ludwig125/python-getting-started] $ cat hello/views.py
import requests   ← 追加
from django.shortcuts import render
from django.http import HttpResponse

from .models import Greeting

## Create your views here.
#def index(request):
#    # return HttpResponse('Hello from Python!')
#    return render(request, 'index.html')               ← ここをコメントアウトして、以下のindex関数を追加
def index(request):
    r = requests.get('http://httpbin.org/status/418')
    print(r.text)
    return HttpResponse('<pre>' + r.text + '</pre>')


def db(request):

    greeting = Greeting()
    greeting.save()

    greetings = Greeting.objects.all()

    return render(request, 'db.html', {'greetings': greetings})

(python-getting-started-1TrsocCI) [~/git/ludwig125/python-getting-started] $
修正が終わったらheroku local
(python-getting-started-1TrsocCI) [~/git/ludwig125/python-getting-started] $ heroku local
[OKAY] Loaded ENV .env File as KEY=VALUE Format
00:03:32 web.1   |  [2017-12-23 00:03:32 +0900] [12475] [INFO] Starting gunicorn 19.7.1
00:03:32 web.1   |  [2017-12-23 00:03:32 +0900] [12475] [INFO] Listening at: http://0.0.0.0:5000 (12475)
00:03:32 web.1   |  [2017-12-23 00:03:32 +0900] [12475] [INFO] Using worker: sync
00:03:32 web.1   |  [2017-12-23 00:03:32 +0900] [12478] [INFO] Booting worker with pid: 12478
この状態で再び http://localhost:5000/ へアクセス 可愛い絵が現れた(以下の絵)
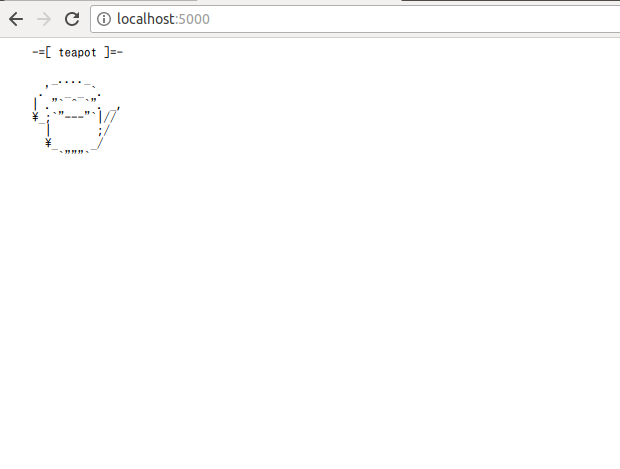
また、以下にも絵が出力された
(python-getting-started-1TrsocCI) [~/git/ludwig125/python-getting-started] $ heroku local
[OKAY] Loaded ENV .env File as KEY=VALUE Format
00:03:32 web.1   |  [2017-12-23 00:03:32 +0900] [12475] [INFO] Starting gunicorn 19.7.1
00:03:32 web.1   |  [2017-12-23 00:03:32 +0900] [12475] [INFO] Listening at: http://0.0.0.0:5000 (12475)
00:03:32 web.1   |  [2017-12-23 00:03:32 +0900] [12475] [INFO] Using worker: sync
00:03:32 web.1   |  [2017-12-23 00:03:32 +0900] [12478] [INFO] Booting worker with pid: 12478
00:04:52 web.1   |  [2017-12-23 00:04:52 +0900] [12475] [CRITICAL] WORKER TIMEOUT (pid:12478)
00:04:52 web.1   |  [2017-12-22 15:04:52 +0000] [12478] [INFO] Worker exiting (pid: 12478)
00:04:52 web.1   |      -=[ teapot ]=-
00:04:52 web.1   |         _...._
00:04:52 web.1   |       .'  _ _ `.
00:04:52 web.1   |      | ."` ^ `". _,
00:04:52 web.1   |      \_;`"---"`|//
00:04:52 web.1   |        |       ;/
00:04:52 web.1   |        \_     _/
00:04:52 web.1   |          `"""`
00:04:52 web.1   |  [2017-12-23 00:04:52 +0900] [12573] [INFO] Booting worker with pid: 12573
この画像は、当然先程直したindex関数の中で指定したURLの画像 http://httpbin.org/status/418
ここまでをリモートに反映
$ git add .
$ git commit -m "Demo"

herokuサーバにデプロイ
$ git push heroku master
全部うまく行っていることを確認する
$ heroku open
https://powerful-chamber-29168.herokuapp.com/ のブラウザが起動してさっきの画像が表示される
Start a console
https://devcenter.heroku.com/articles/getting-started-with-python#start-a-console
コンソールを起動する
さっきの画像がpythonのREPLで見られるよって話
(python-getting-started-1TrsocCI) [~/git/ludwig125/python-getting-started] $ heroku run python manage.py shell
Running python manage.py shell on ⬢ powerful-chamber-29168... up, run.8841 (Free)
Python 3.6.3 (default, Nov 14 2017, 17:29:48)
[GCC 5.4.0 20160609] on linux
Type "help", "copyright", "credits" or "license" for more information.
(InteractiveConsole)
>>> import requests
>>> print(requests.get('http://httpbin.org/status/418').text)

    -=[ teapot ]=-

       _...._
     .'  _ _ `.
    | ."` ^ `". _,
    \_;`"---"`|//
      |       ;/
      \_     _/
        `"""`

>>>
>>> exit()
(python-getting-started-1TrsocCI) [~/git/ludwig125/python-getting-started] $
bashも起動できる
(python-getting-started-1TrsocCI) [~/git/ludwig125/python-getting-started] $ heroku run bash
Running bash on ⬢ powerful-chamber-29168... up, run.2947 (Free)
~ $ ls
app.json        hello      Pipfile       Procfile          README.md         runtime.txt
gettingstarted  manage.py  Pipfile.lock  Procfile.windows  requirements.txt  staticfiles
~ $ echo "test"
test
~ $
~ $ exit
exit
(python-getting-started-1TrsocCI) [~/git/ludwig125/python-getting-started] $
Define config vars
https://devcenter.heroku.com/articles/getting-started-with-python#define-config-vars
環境変数を定義 先程のhello/view.pyを以下のように書き換え
import os  ← 追加

def index(request):    ← このように書き換え
    times = int(os.environ.get('TIMES',3))
    return HttpResponse('Hello! ' * times)
os.environ.get は環境変数を読み込んでなければデフォルト値(上の例だと3)を使うという意味(pythonの文法)
チュートリアルの場合、.envは以下に定義されているので、TIMES=2が適用されるはず
(python-getting-started-1TrsocCI) [~/git/ludwig125/python-getting-started] $ cat .env
TIMES=2
(python-getting-started-1TrsocCI) [~/git/ludwig125/python-getting-started] $
$ heroku local で実行
ブラウザには「Hello! Hello!」とHello!が2個実行された
この環境変数を変えるには以下のコマンドをする
$ heroku config:set TIMES=5
実行すると、変数が変わっていることが確認できる
(python-getting-started-1TrsocCI) [~/git/ludwig125/python-getting-started] $ heroku config
=== powerful-chamber-29168 Config Vars
DATABASE_URL: postgres://ogrzfymdqwvqaz:49b120efdf13380c9dfeba77a533744212084d29e5b3b18d5389e8015711b85a@ec2-184-73-240-228.compute-1.amazonaws.com:5432/dbejvvccb8644e
TIMES:        5
(python-getting-started-1TrsocCI) [~/git/ludwig125/python-getting-started] $
これを以下の通りデプロイしてブラウザで見るとHello!は5つになる
$ git push heroku master
$ heroku open
https://powerful-chamber-29168.herokuapp.com/ → Hello! Hello! Hello! Hello! Hello!
herokuについて参考にしたページ
https://qiita.com/Arashi/items/b2f2e01259238235e187
http://kasoutuuka.org/heroku-hello
VMのUbuntuに対して指定のポートが有効かどうか確認する
概要
- 以前こちらでも設定したが、ufwで特定のポートからのアクセスを許可する方法と、それが有効か確認する方法を記載する
ufwとは
第76回 Ubuntuのソフトウェアファイアウォール:UFWの利用(1):Ubuntu Weekly Recipe|gihyo.jp … 技術評論社
ufw(Uncomplicated FireWall)は,Ubuntuで標準的に利用できる,「iptablesを簡単に設定するツール」です。ufwを利用することで,「外部からの接続は基本的に受け付けない」「sshだけは許す」などといった設定を,iptablesにくらべて格段に少ない操作で実現できます。
新たにポートを許可
- Ubuntuで以下を設定
[~] $sudo ufw allow 5000
ルールを追加しました
[~] $
- ufw statusでポートを確認する
- ※もともと80は有効。8181は上の記事で有効にしたもの
[~] $sudo ufw status
状態: アクティブ

To                         Action      From
--                         ------      ----
8181                       ALLOW       Anywhere
80                         ALLOW       Anywhere
5000                       ALLOW       Anywhere

[~] $
ホストOSのWindowsから見られることを確認
- Ubuntuで先程追加した5000番のポートを指定してWebサーバを立ち上げる
[~] $python3 -m http.server --cgi 5000
Serving HTTP on 0.0.0.0 port 5000 (http://0.0.0.0:5000/) ...
- Windows側のブラウザで以下のアドレスを見てみる
http://192.168.3.11:5000
[~] $python3 -m http.server --cgi 5000
Serving HTTP on 0.0.0.0 port 5000 (http://0.0.0.0:5000/) ...
192.168.3.2 - - [31/Jan/2018 00:06:54] "GET / HTTP/1.1" 200 -
192.168.3.2 - - [31/Jan/2018 00:06:54] code 404, message File not found
192.168.3.2 - - [31/Jan/2018 00:06:54] "GET /favicon.ico HTTP/1.1" 404 -
192.168.3.2 - - [31/Jan/2018 00:07:02] "GET / HTTP/1.1" 200 -
telnetで確認
- WindowsのコマンドプロンプトからUbuntuのアドレスとポートを指定してtelnetする
- コマンドプロンプトは、スタートメニューから「cmd」で行ける
- Window7でtelnetコマンドを使うためには以下を有効にする必要がある
- ポートが開いているかどうかをtelnetで確認する方法 | Knowledge Base
Windows VistaとWindows 7の場合、まず、telnetを有効にしなければならないことがあります: [スタート]->[コントロール パネル]->[プログラム]へ移動してください; [プログラムと機能]のメニューの[Windowsの機能の有効化または無効化]をクリックしてください; [Telnetクライアント]と[Telnetサーバー]の両方にチェックマークを付けてください; [OK]をクリックしてください。
- ポートが開いているかどうかをtelnetで確認する方法 | Knowledge Base
C: >telnet 192.168.3.11 5000
- ポートへの接続が有効な場合は以下の真っ黒な画面が表示される

- この画面で適当に打ち込むとUbuntu側に返していることがわかる
- 以下はabcdeと打ったときの結果
[~] $python3 -m http.server --cgi 5000
Serving HTTP on 0.0.0.0 port 5000 (http://0.0.0.0:5000/) ...
192.168.3.2 - - [31/Jan/2018 00:06:54] "GET / HTTP/1.1" 200 -
192.168.3.2 - - [31/Jan/2018 00:06:54] code 404, message File not found
192.168.3.2 - - [31/Jan/2018 00:06:54] "GET /favicon.ico HTTP/1.1" 404 -
192.168.3.2 - - [31/Jan/2018 00:07:02] "GET / HTTP/1.1" 200 -
192.168.3.2 - - [31/Jan/2018 00:15:20] code 400, message Bad request syntax ('abcde')
192.168.3.2 - - [31/Jan/2018 00:15:20] "abcde" 400 -
5000が有効になったことを確認できた
zshを使う
ずーーっとbashだったけれど、別に信仰があるわけじゃないので、いいかげんzsh使ってみる
参考リンクだけまとめる(自分が書かなくても他の人がいっぱい書いているからこれでいいや)
.zshrcの設定例(設定内容の説明コメント付き) - Qiita
自分なりにカスタムした設定
異なるウィンドウで履歴を共有しない
履歴を共有すると、screenの異なるウィンドウで実行したコマンド履歴が混じってきてうっとうしいので以下を使わないようにコメントアウトする
#### 同時に起動したzshの間でヒストリを共有する
#setopt share_history
Macのpbcopyと同じようにクリップボードにコピーする
参考: Macのpbcopyをubuntuでも使う - Qiita
$ sudo apt-get install xsel
~/.zshrcに以下を追加
alias pbcopy='xsel --clipboard --input'
反映
source ~/.zshrc
最初これを参考に追加したがなぜかうまく行かなかったので上の設定をした Mac でも Linux でも一発でクリップボードにコピーする zsh の alias - mollifier delta blog
トラブル
zshにしたらpyenvが使えなくなった
zshにしたらpyenvが使えなくなった
djangoでも以下のようなエラーが出て焦る
[~/git/django-tutorial/tutorial/mysite] $python manage.py runserver                                                              (git)-[master]
  File "manage.py", line 14
    ) from exc
         ^
SyntaxError: invalid syntax
[~/git/django-tutorial/tutorial/mysite] $
~/.bashrcの中身を~/.zshrcにコピーするのを忘れていた
[~/git] $which pyenv                                                                                                             (git)-[master]
pyenv not found
[~/git] $sudo find / -name pyenv                                                                                                 (git)-[master]
[sudo] password for ludwig125:
/home/ludwig125/.pyenv/libexec/pyenv
/home/ludwig125/.pyenv/bin/pyenv
[~/git] $                                                                                                                        (git)-[master]
[~/git] $                                                                                                                        (git)-[master]
[~/git] $                                                                                                                        (git)-[master]
[~/git] $                                                                                                                        (git)-[master]
[~/git] $                                                                                                                        (git)-[master]
[~/git] $                                                                                                                        (git)-[master]
[~/git] $export PYENV_ROOT="$HOME/.pyenv"                                                                                        (git)-[master]
[~/git] $export PATH="$PYENV_ROOT/bin:$PATH"                                                                                     (git)-[master]
[~/git] $eval "$(pyenv init -)"                                                                                                  (git)-[master]
[~/git] $pyenv                                                                                                                   (git)-[master]
pyenv 1.1.5-8-g7b9d1a4
Usage: pyenv <command> [<args>]

Some useful pyenv commands are:
   commands    List all available pyenv commands
   local       Set or show the local application-specific Python version
   global      Set or show the global Python version
   shell       Set or show the shell-specific Python version
   install     Install a Python version using python-build
   uninstall   Uninstall a specific Python version
   rehash      Rehash pyenv shims (run this after installing executables)
   version     Show the current Python version and its origin
   versions    List all Python versions available to pyenv
   which       Display the full path to an executable
   whence      List all Python versions that contain the given executable

See `pyenv help <command>' for information on a specific command.
For full documentation, see: https://github.com/pyenv/pyenv#readme
[~/git] $which pyenv                                                                                                             (git)-[master]
pyenv () {
        local command
        command="$1"
        if [ "$#" -gt 0 ]
        then
                shift
        fi
        case "$command" in
                (rehash|shell) eval "$(pyenv "sh-$command" "$@")" ;;
                (*) command pyenv "$command" "$@" ;;
        esac
}
[~/git] $
ということでこれを~/.zshrcにコピーする
export PYENV_ROOT="$HOME/.pyenv"
export PATH="$PYENV_ROOT/bin:$PATH"
eval "$(pyenv init -)"
pythonのpandasを使う
参考
Pandas でデータフレームを作ってみよう – Python でデータサイエンス
[Python] pandasの使い方まとめ - Qiita
Pandas の DataFrame の基本的な使い方 - akiyoko blog
Python Pandasでのデータ操作の初歩まとめ − 前半:データ作成&操作編 - Qiita
インストール
$ pip install pandas
csvファイルを出力
[~/git/work/src/python/memo/pandas] $ cat padas-test.py
import pandas as pd

df = pd.DataFrame([
         ['a', 'b', 'c'],
         ['d', 'e', 'f']
     ])

df.to_csv("./output.csv")
[~/git/work/src/python/memo/pandas] $ python3 padas-test.py
[~/git/work/src/python/memo/pandas] $ cat ./output.csv
,0,1,2
0,a,b,c
1,d,e,f
[~/git/work/src/python/memo/pandas] $
Ubuntu14.0.4でホスト名とユーザ名を変更する
概要
VMのUbuntu14.0.4でホスト名とユーザ名を変更したのが意外と大変だったのでメモ
以下では、ホスト名も、ユーザ名も、gitアカウントと同じ「ludwig125」にすることを目指した
参考
ホスト名
ホスト名:hostnameコマンドの結果出力するUbuntuのホスト名を指す
ホスト名の変更は簡単だった
- 以下のホスト名を変更するだけ
 sudo vim /etc/hostname
 sudo vim /etc/hosts
反映させるにはUbuntuの再起動が必要
確認
$ hostname
ludwig125-virtual-machine
※「-virtual-machine」の部分をつけたほうがホスト名として分かり易いのでつけた
ユーザ名の変更
ユーザ名:whoコマンドで出力されるユーザの名前
ユーザ名の変更はusermodで行う
usermodをする上での問題
しかし、自分のユーザ名を変更しようとしても、自分自身のプロセスがあるので変えられないという問題がある
$ sudo usermod -l ludwig125 <今のユーザ名>
usermod: user <今のユーザ名> is currently used by process 1495
$
別のユーザを作る
自分自身のプロセスが動いている状態で自分のユーザ名を変えられないので、別にユーザを作った (もっといい方法があるかもしれない・・・)
- adduserで「temp_user」ユーザを追加
$ sudo adduser temp_user
ユーザー `temp_user' を追加しています...
新しいグループ `temp_user' (1001) を追加しています...
新しいユーザー `temp_user' (1001) をグループ `temp_user' に追加しています...
ホームディレクトリ `/home/temp_user' を作成しています...
`/etc/skel' からファイルをコピーしています...
新しい UNIX パスワードを入力してください:
新しい UNIX パスワードを再入力してください:
passwd: パスワードは正しく更新されました
temp_user のユーザ情報を変更中
新しい値を入力してください。標準設定値を使うならリターンを押してください
    フルネーム []: temp
    部屋番号 []:
    職場電話番号 []:
    自宅電話番号 []:
    その他 []:
以上で正しいですか? [Y/n] y
temp_userにsudo権限を追加
作ったばかりのtemp_userにはsudo権限がないので temp_userでusermodをすると以下のエラーが出た
$ usermod
コマンド 'usermod' は '/usr/sbin/usermod' で利用できます
'/usr/sbin'がPATH環境変数に含まれていないためコマンドを特定できませんでした。
大抵の場合、お使いのユーザーアカウントに管理者特権がないことが原因です。
usermod: コマンドが見つかりません
temp_user@ludwig125-virtual-machine:/home$ useradd
コマンド 'useradd' は '/usr/sbin/useradd' で利用できます
'/usr/sbin'がPATH環境変数に含まれていないためコマンドを特定できませんでした。
大抵の場合、お使いのユーザーアカウントに管理者特権がないことが原因です。
useradd: コマンドが見つかりません
temp_userでusermodをできるように、予めtemp_userにsudo権限を付けておく
sudoユーザーを追加する方法 - Linux入門 - Webkaru
以下はtemp_userではなく、もとのユーザ権限で実行
usermod -G sudo temp_user
temp_userでログインし直す
ubuntuのユーザをみて、temp_userに切り替える
temp_userでusermod実行
temp_user内で改めてusermodを実行
$ sudo usermod -l ludwig125 <今のユーザ名>
usermod: user <今のユーザ名> is currently used by process 1495
$
もとのユーザのプロセスが動いているので、全部killする
sudo kill -9 プロセスID
再度usermodを実行したら、今度はうまくいった
ユーザディレクトリの名前を変更
$ ls /home
$ cd /home
$ sudo mv もとのユーザ ludwig125
$ ls /home
ludwig125  temp_user
whoで確認
[~] $ who
ludwig125 :0           2017-12-16 22:42 (:0)
ludwig125 pts/5        2017-12-16 22:46 (:0:S.0)
ludwig125 pts/13       2017-12-16 22:46 (:0:S.1)
[~] $
更に/etc/passwdのユーザディレクトリを変える
$ sudo vim /etc/passwd
で
ludwig125:x:1000:1000:ludwig125:/home/ludwig125:/bin/bash
↑この/home以下のディレクトリ名をもとのユーザ名から変える
上記までの対応によって生じた問題
トラブル1.VMとホストOSとの間でコピペができない
名前変更後、VMのデータをコピーしてホストOSのWindowsにペーストできないという問題が生じた
ホスト名を変えてしまったのでvmwaretoolsが機能していない可能性がある
いったんVMもホストOSも再起動したらコピペができるようになった
- 参考 vmware toolsとは
VMware Tools の概要
VMware Tools は、仮想マシンのゲスト OS のパフォーマンスを強化し、仮想マシンの管理を改善するユーティリティのスイートです。ゲスト OS に VMware Tools をインストールしておかないと、ゲストで重要な機能を実行できません。VMware Tools をインストールすると、次のような問題が排除または改善されます。
ビデオの解像度が低い
カラー深度が不十分
ネットワーク速度の表示が正しくない
マウスの動きが制限される
コピー アンド ペーストやファイルのドラッグ アンド ドロップができない
音声が出ない
ゲスト OS の静止スナップショットを作成する機能が用意される
ゲスト OS とホストの時刻が同期される
トラブル2. linuxのグループが変わっていない
グループ名が昔のまま変わっていなかったので変える
usermod -g グループ名 ユーザ名
[/home] $ sudo groupadd ludwig125
[/home] $ sudo  usermod -g  ludwig125 ludwig125
[/home] $
トラブル3. git に接続できない
名前変更後、gitに接続できない
git pullできない 「Permission denied (publickey).」が出た
[~/git/work] $ git pull
Warning: Permanently added the RSA host key for IP address '192.30.255.113' to the list of known hosts.
Permission denied (publickey).
fatal: Could not read from remote repository.

Please make sure you have the correct access rights
and the repository exists.
[~/git/work] $
以下を参考に調べて見る
githubで"Permission denied (publickey)."が出た時はssh -Tで繋ぎ直す - Qiita Error: Permission denied (publickey) - User Documentation Git - SSH 公開鍵の作成
[~/git/work] $ ssh -vT git@github.com
OpenSSH_6.6.1, OpenSSL 1.0.1f 6 Jan 2014
debug1: Reading configuration data /etc/ssh/ssh_config
debug1: /etc/ssh/ssh_config line 19: Applying options for *
debug1: Connecting to github.com [192.30.255.112] port 22.
debug1: Connection established.
debug1: identity file /home/ludwig125/.ssh/id_rsa type 1
debug1: identity file /home/ludwig125/.ssh/id_rsa-cert type -1
debug1: identity file /home/ludwig125/.ssh/id_dsa type -1
debug1: identity file /home/ludwig125/.ssh/id_dsa-cert type -1
debug1: identity file /home/ludwig125/.ssh/id_ecdsa type -1
debug1: identity file /home/ludwig125/.ssh/id_ecdsa-cert type -1
debug1: identity file /home/ludwig125/.ssh/id_ed25519 type -1
debug1: identity file /home/ludwig125/.ssh/id_ed25519-cert type -1
debug1: Enabling compatibility mode for protocol 2.0
debug1: Local version string SSH-2.0-OpenSSH_6.6.1p1 Ubuntu-2ubuntu2.8
debug1: Remote protocol version 2.0, remote software version libssh_0.7.0
debug1: no match: libssh_0.7.0
debug1: SSH2_MSG_KEXINIT sent
debug1: SSH2_MSG_KEXINIT received
debug1: kex: server->client aes128-ctr hmac-sha1 none
debug1: kex: client->server aes128-ctr hmac-sha1 none
debug1: sending SSH2_MSG_KEX_ECDH_INIT
debug1: expecting SSH2_MSG_KEX_ECDH_REPLY
debug1: Server host key: RSA 16:27:ac:a5:76:28:2d:36:63:1b:56:4d:eb:df:a6:48
debug1: Host 'github.com' is known and matches the RSA host key.
debug1: Found key in /home/ludwig125/.ssh/known_hosts:1
debug1: ssh_rsa_verify: signature correct
debug1: SSH2_MSG_NEWKEYS sent
debug1: expecting SSH2_MSG_NEWKEYS
debug1: SSH2_MSG_NEWKEYS received
debug1: SSH2_MSG_SERVICE_REQUEST sent
debug1: SSH2_MSG_SERVICE_ACCEPT received
debug1: Authentications that can continue: publickey
debug1: Next authentication method: publickey
debug1: Offering RSA public key: /home/ludwig125/.ssh/id_rsa
debug1: Authentications that can continue: publickey
debug1: Trying private key: /home/ludwig125/.ssh/id_dsa
debug1: Trying private key: /home/ludwig125/.ssh/id_ecdsa
debug1: Trying private key: /home/ludwig125/.ssh/id_ed25519
debug1: No more authentication methods to try.
Permission denie
[~/git/work] $
ホスト名を変えたからなのか、なぜなのかわからないけれど、git にssh鍵が登録されていないみたい
以前書いた自分のブログを参考にssh鍵を作って登録し直す
登録後
[~/git/work] $ ssh -vT git@github.com
OpenSSH_6.6.1, OpenSSL 1.0.1f 6 Jan 2014
debug1: Reading configuration data /etc/ssh/ssh_config
debug1: /etc/ssh/ssh_config line 19: Applying options for *
debug1: Connecting to github.com [192.30.255.113] port 22.
debug1: Connection established.
debug1: identity file /home/ludwig125/.ssh/id_rsa type 1
debug1: identity file /home/ludwig125/.ssh/id_rsa-cert type -1
debug1: identity file /home/ludwig125/.ssh/id_dsa type -1
debug1: identity file /home/ludwig125/.ssh/id_dsa-cert type -1
debug1: identity file /home/ludwig125/.ssh/id_ecdsa type -1
debug1: identity file /home/ludwig125/.ssh/id_ecdsa-cert type -1
debug1: identity file /home/ludwig125/.ssh/id_ed25519 type -1
debug1: identity file /home/ludwig125/.ssh/id_ed25519-cert type -1
debug1: Enabling compatibility mode for protocol 2.0
debug1: Local version string SSH-2.0-OpenSSH_6.6.1p1 Ubuntu-2ubuntu2.8
debug1: Remote protocol version 2.0, remote software version libssh_0.7.0
debug1: no match: libssh_0.7.0
debug1: SSH2_MSG_KEXINIT sent
debug1: SSH2_MSG_KEXINIT received
debug1: kex: server->client aes128-ctr hmac-sha1 none
debug1: kex: client->server aes128-ctr hmac-sha1 none
debug1: sending SSH2_MSG_KEX_ECDH_INIT
debug1: expecting SSH2_MSG_KEX_ECDH_REPLY
debug1: Server host key: RSA 16:27:ac:a5:76:28:2d:36:63:1b:56:4d:eb:df:a6:48
The authenticity of host 'github.com (192.30.255.113)' can't be established.
RSA key fingerprint is 16:27:ac:a5:76:28:2d:36:63:1b:56:4d:eb:df:a6:48.
Are you sure you want to continue connecting (yes/no)? yes
Warning: Permanently added 'github.com,192.30.255.113' (RSA) to the list of known hosts.
debug1: ssh_rsa_verify: signature correct
debug1: SSH2_MSG_NEWKEYS sent
debug1: expecting SSH2_MSG_NEWKEYS
debug1: SSH2_MSG_NEWKEYS received
debug1: SSH2_MSG_SERVICE_REQUEST sent
debug1: SSH2_MSG_SERVICE_ACCEPT received
debug1: Authentications that can continue: publickey
debug1: Next authentication method: publickey
debug1: Offering RSA public key: /home/ludwig125/.ssh/id_rsa
debug1: Server accepts key: pkalg ssh-rsa blen 279
debug1: key_parse_private2: missing begin marker
debug1: read PEM private key done: type RSA
debug1: Authentication succeeded (publickey).
Authenticated to github.com ([192.30.255.113]:22).
debug1: channel 0: new [client-session]
debug1: Entering interactive session.
debug1: Sending environment.
debug1: Sending env LANG = ja_JP.UTF-8
debug1: client_input_channel_req: channel 0 rtype exit-status reply 0
Hi ludwig125! You've successfully authenticated, but GitHub does not provide shell access.
debug1: channel 0: free: client-session, nchannels 1
Transferred: sent 3312, received 1872 bytes, in 0.2 seconds
Bytes per second: sent 14182.2, received 8016.0
debug1: Exit status 1
[~/git/work] $
成功 git pullもgit pushもできるようになった! ブログ書いててよかったよ
トラブル4. pip3が使えなくなってた
誤ったインタプリタです: そのようなファイルやディレクトリはありません
pip3を使おうとしたらこんなエラーが
[~/git/work/src/python/memo/pandas] $ pip3 install pandas_ply
/home/ludwig125/.pyenv/pyenv.d/exec/pip-rehash/pip: /home/ludwig125/.pyenv/versions/3.5.4/bin/pip3: /home/前のユーザ名/.pyenv/versions/3.5.4/bin/python3.5: 誤ったインタプリタです: そのようなファイルやディレクトリはありません
前のユーザ名のパスを見ようとしている?
解決できないのでpyenvごと削除して作り直す
[~] $ pyenv versions
* system (set by /home/ludwig125/.python-version)
  3.5.4
[~] $ pyenv uninstall 3.5.4
pyenv: remove /home/ludwig125/.pyenv/versions/3.5.4? yes
[~] $


[~] $  pyenv install 3.5.4
Downloading Python-3.5.4.tar.xz...
-> https://www.python.org/ftp/python/3.5.4/Python-3.5.4.tar.xz
Installing Python-3.5.4...
Installed Python-3.5.4 to /home/ludwig125/.pyenv/versions/3.5.4

$ pyenv local 3.5.4で移動
これでpip3を使えるようにになった
[~] $
[~] $ pip3 --version
pip 9.0.1 from /home/ludwig125/.pyenv/versions/3.5.4/lib/python3.5/site-packages (python 3.5)
[~] $